Africa – seemed to be an unreachable dream when I was a child. So far, so wild, so tempting and dangerous yet charming and fascinating. High Mountains, wide rivers, vast deserts, endless landscapes and exotic animals – the African Kilimanjaro adventure will take your through five different ecosystems – from rain forest to alpine desert to arctic snow cap of the summit.
Quick links:
Which route and company to choose and what is the cost of the Kilimanjaro adventure?
How much should you tip your Kilimanjaro guides and porters?
How to prepare yourself for the 6895m Kilimanjaro ascend?
What to pack for your Kilimanjaro trek?
Kilimanjaro – the Journey
The journey started with the flight to Nairobi, Kenya and the 5-6 hours bus ride to Arusha, Tanzania. The border crossing between the two countries was quite fast, visa on arrival 55 USD for 30 days (US citizens had to buy 90 days visa for 100 USD). On the way our bus almost broke in the middle of nowhere – transmission stopped switching the gears, but we still managed to reach our destination and had the first preview of a safari with giraffes, hyenas and monkeys wandering along the road.
Overnight in a nice hotel, which was a pleasant surprise.
Kilimanjaro Day 1:
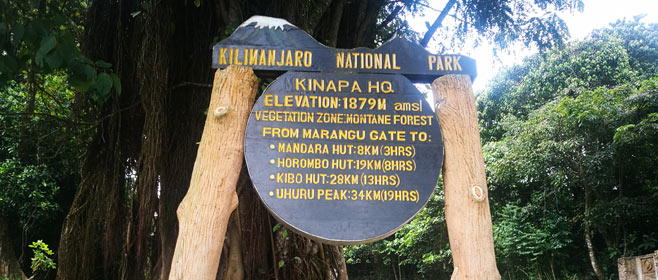
After a too long paper work and administrative/organizational preparations we finally moved out toward our goal – Kilimanjaro mountain at around 10-11 a.m. Few hours later we reached the Marangu Gate (1879m) – the entrance of Mount Kilimanjaro National Park. Again completed paper work of registration for the track, which is mandatory in every camp/check point during the hike.
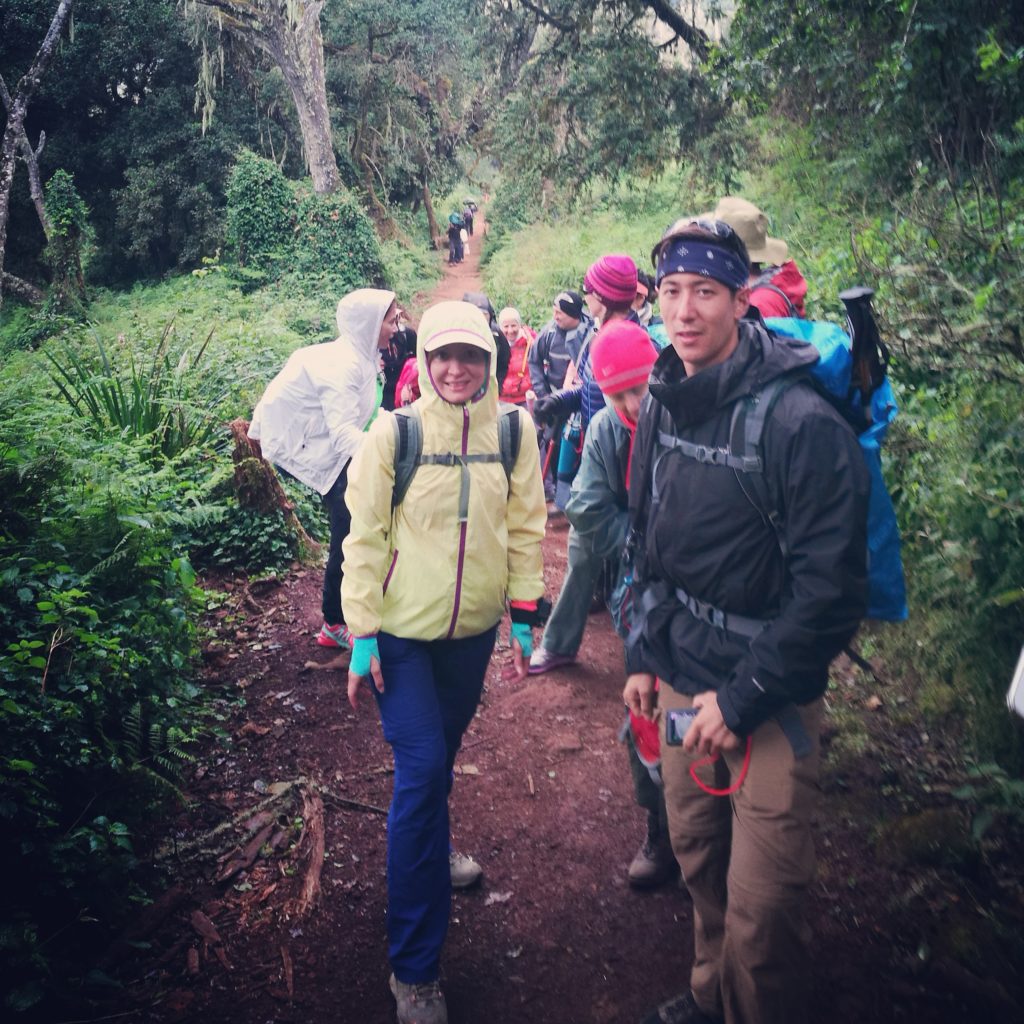
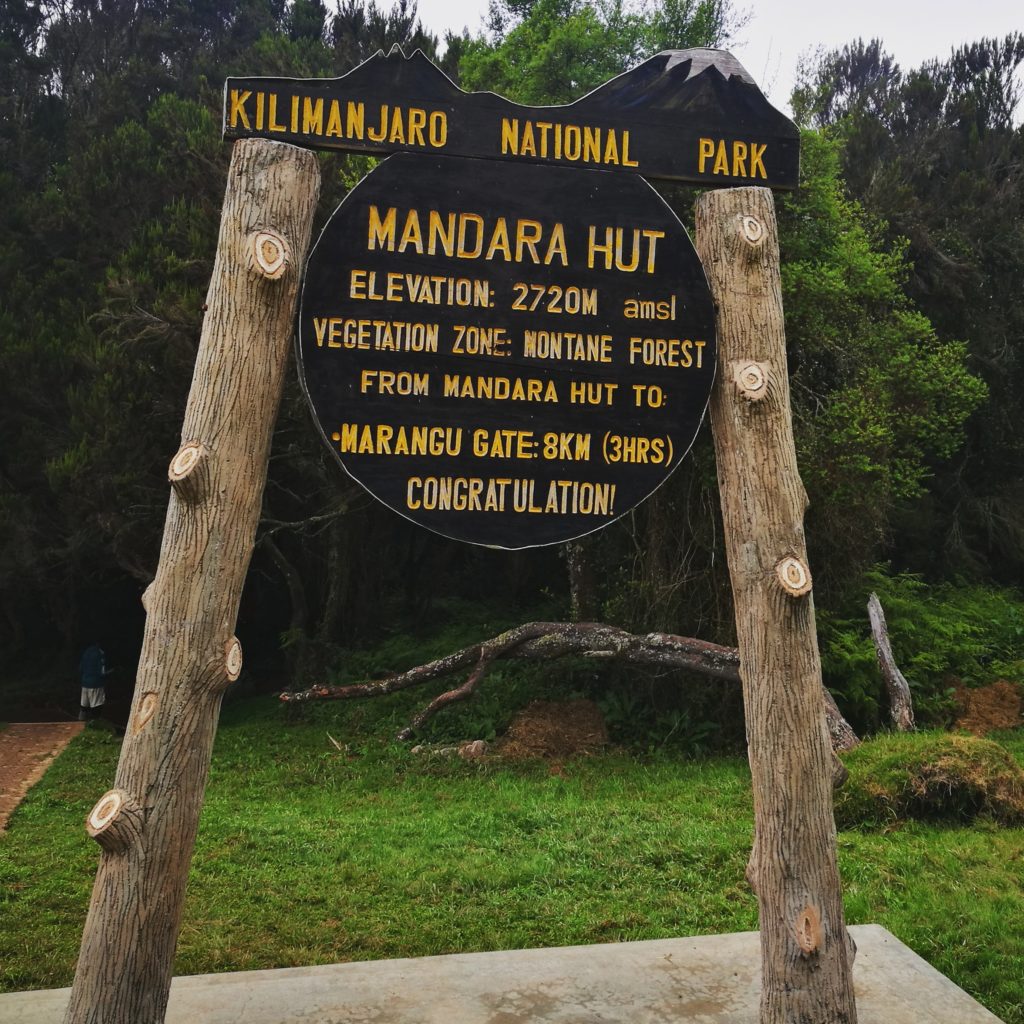
The adventurous picturesque hike through the rain forest took us around 5-6 hours till we reached the first camp – Mandara Hut on the elevation of 2720m. Half way we had to walk in the dark using our headlights or torches.
As we were too late to arrive, we’ve got only a huge room over the common dining room/kitchen for all 13 pax to share, or it might have been due to a lower cost of logging? The temperatures up in the mountains during the night sank to 10°C.
One of the most important things in climbing the mountains is to keep oneself hydrated drinking at least 4 litres, better 5-6, of water a day. This hydration brings a challenge to be all the time in need of a washroom underneath a bush or a tree or behind a rock. Or you have to leave your cosy warm sleeping bag that you’ve just warmed up, for a run to the loo on the other side of the camp. Toilets in the camps also became a challenge for some fellows who were not used to a “pit in the floor” version. Some of them went on to experiment how to use it – placing themselves with the back to the door, reporting a better pointing experience. This grew to a joke “what if you lose control and make a backwards roll out of the toilet cell with no pants on”. (the doors were not always closed).
Kilimanjaro Day 2:
After a good breakfast, we moved farther to our next goal – Horombo Hut on the elevation of 3720m. Another 1000m to climb. The rain forest slowly turned to a bushy valley with beautiful African vegetation with evergreen flowers along the way.
 Kilimanjaro Day 2


The hike for this day was around 7-8 hours with a lunch break with an amazing view of snow covered Kibo and rocky Mawenzi peaks.
The only animals we saw from now were the fat crows that were happy to get our chicken leftovers after the lunch.
The temperature continued to decrease as we climbed higher and higher.
 Kilimanjaro Flowers - Day 2


Horombo Hut lies over the clouds and we had to put extra layers of fleece and warm hats to protect us from the strong winds and low temperatures of around 10°C. The night temperature sank to 5-0°C. The huts on the mountains have no heaters in the rooms.
 Kilimanjaro Day 2 - Horombo Hut


Kilimanjaro Day 3:
Breakfast with porridge, eggs, toasts and pancakes and start to the last camp before the Summit – Kibo Hut at 4700m – another hike for 6-8 hours.
We were told to take as much water as we can – at least 6 litres each. The fact that my bag was too heavy with water and the day pack gear and that we sprinted too fast – made my acclimatization to a struggle. I was out of breath but pushed myself further and further, my heart raced, but I payed less attention to it at that time – huge mistake as I understood later.
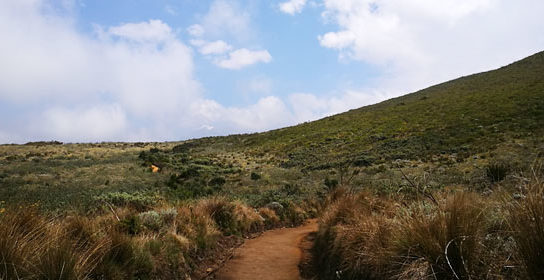
The scenery around us changed from green bushes with bizarre African trees and everlasting beautiful little flowers to a stony tundra desert with no greenery at all. We passed in the valley pass way between the peaks of Mawenzi and Kibo.
 Kilimanjaro Day 3 - Landscapes


It was around 7-8 p.m. after rooms had been sorted, registration and repacking our stuff done, when we finally got our dinner and went to bed for around 3 hours as the wake up was at 10-11 p.m. to start the Summit hike at midnight.
Things I should have done better:
- Shouldn’t have carried that much water on me. Everyone got their bottles filled on the peak.
- Shouldn’t have trekked so fast reaching the peak with the first group, challenging my heart too much before the final Summit.
- Too short acclimatization on 4700m with only 5 hours (couldn’t do anything about it as this was the plan of the organizers). Met some wiser organizers, who offered a buffer acclimatization day before the last Summit.
 Kilimanjaro Day 3 - Kibo Hut


Kilimanjaro Day 4:
Started at midnight. We moved out in the dark under the almost full moon that were shining so bright, that we actually didn’t need the headlights. The guide in front was pacing to fast and even after multiple requests from our guide to slow down he still accelerated on his way. The rhythm was not that good – walking too fast with no breaks, but then stopping for a long break, when we cooled down and began to freeze. We overtook a lot of groups of climbers on our way, who were stepping wisely slow. After few hours, struggling with the heart race I had to give my bag to a porter and later slow down, leave the fastest group and move on my own pace accompanied by one of the porters. I’m really grateful to this guy who patiently walked with me with all my stops to catch on my breath. At some point, I felt how my left hand went numb and my heart race was too fast. I was very close to a heart attack – that was the toughest physical challenge I’ve ever put my body through. The advanced mountain hiker lady in our group gave us a tip – to make a short stop after each 30 breaths to catch the breath and then to move on. This technique helped a lot to continue the climb. I was actually not a lot slower than the first group as I moved just a bit slower and I made short stops every now and then compared to the others, that raced and then made stops of 15-20 minutes in the freezing -10 -15°C. Sometimes I even managed to catch up with them, but then they raced further again.
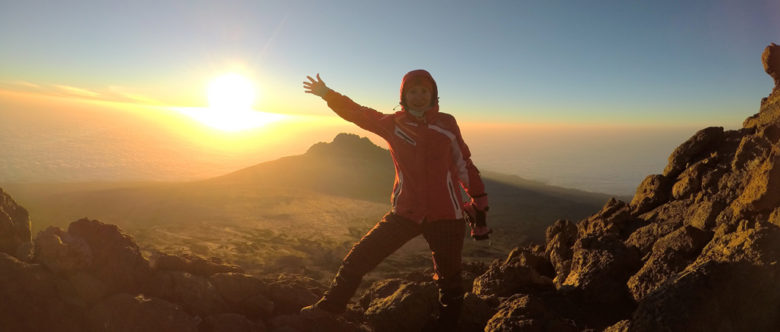
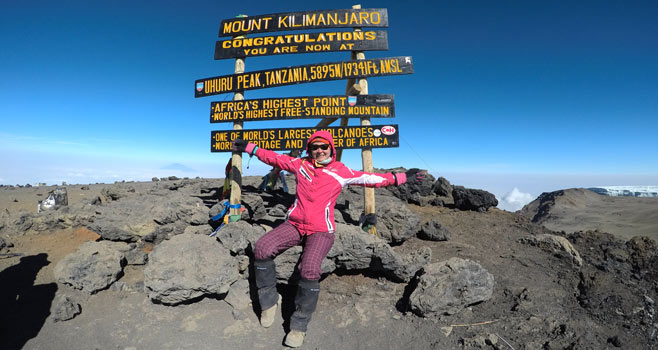
The climb was quite steep on stones and the temperature close to the first Gillman’s Point peak was around -15°C. My hands and toes were freezing, somehow, I was not really prepared for this kind of cold, wearing my ski jacket and pants with two layers of thermal underwear and 2 layers of fleece shirts, though wearing summer trekking shoes. I was already imagining my toes frozen to the point they would need to be amputates, when the sun started to rise and we almost reached the first Summit of Gillman’s Point at 5685m. The peak was just there in 5-10 minuets walk, but this few meters were the most difficult to go, but the reward for the first summit was a gorgeous sunrise over the Mawenzi peak standing on the Gillman’s Point peak of 5685m that I reached in around 6 hours. The feeling of the first achievement, that was earned with blood and sweat, gave me the force to move on to the next peak of Stella Point on 5756m and the final Uhuru Summit of 5895m.


The climb to the Uhuru peak took me another 3-4 hours along the crater and volcanic scenery on one side and glacier formations on the other side. The glaciers will be gone in around 10 years due to the global warming. Mount Kilimanjaro is composed of three volcanic cones – Mawenzi, Shira and Kibo. Kibo is a dormant volcano and can erupt any time. The last volcano eruption happened just in 1996. “Uhuru” means “freedom” and was given to the highest point to commemorate the independence of Tanzania in 1964.
After reaching the Uhuru Peak 5895m – it was still not done, as I had to lay all this way back down. It took me about 3-4 hours as I still needed my breaks to catch the breath. The climb and the descend took me 14 hours in total and I was looking forward to a well deserved rest. My heart got a bit better, but my muscles were all worked out to the limits. Though, when I reached the Kibo hut, they told us that we are not staying there for the night and have to pack, have a lunch and move on in an hour. I was so exhausted that I even played with the idea to hire a transportation down on a first aid sledge. Unfortunately, those were all used for the sick hikers and there was not even one sledge left, so I had no other choice as to pack and continue walking for another 5-6 hours.
 Kilimanjaro Day 4 - Landscapes


In total, I walked 20 hours that day. The hike from the Kibo Hut 4700m to the Horombo Hut camp 3720m was better as my heart felt better on the lower elevations and I felt alive again and walked in with the fastest group again.
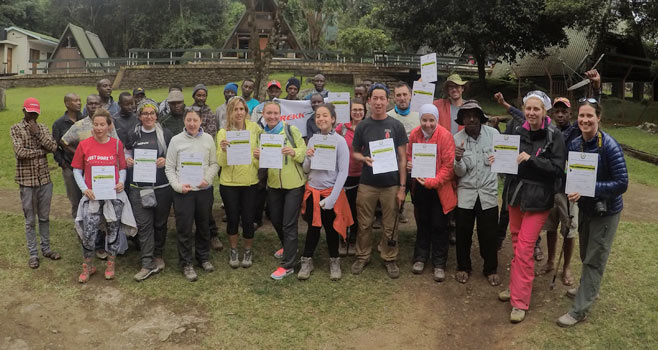
 Kilimanjaro Day 5


Kilimanjaro Day 5:
We spent a night in the Horombo Hut which was still on the elevation over the clouds and moved out towards the Marangu gate at 1980m, took us around 6 hours, where we had lunch. From the Marangu gate we were transported by bus to Arusha – time around 6 hours.
Things, that could have been done better:
Usual misunderstanding of how much to pay the tips for the porters. It was not clear communicated. The meaning of “tips” is gratitude and should be voluntary. If it’s not the tip, but the actual payment that porters are getting – then it should be included into the trip fee as a mandatory fee to avoid the arguments about the tips at the end of the trip, that left a sad feeling and spoiled the experience.
Second thing that was not appropriate – to transport the porters in the same car as the group – squeezed between us on improvisatory chairs. I’m not a princess, but one can easily imagine the smell of a porter, that was carrying 30kgs without a shower facility for more than a week.
Kilimanjaro Day 6: Safari
Which route and company to choose and what is the cost of the Kilimanjaro adventure?
There are seven major routes to ascend the summits of Kilimanjaro:
- Marangu Route – most crowded but the only one with hut shelters instead of the tents – good option in the rainy season. (5-6 days)
- Machame Route – most popular route with scenic views (6-7 days)
- Umbwe Route – shortest and steepest route – least used due to it’s difficulty level (5-6 days)
- Rongai Route – good alternative to Marangu Route (6-7 days)
- Shira Route – similar to Lemosho route – long access drive (7-8 days)
- Lemosho Route – remote and less frequented route (7-8 days)
- Northern Circuit Route – newest and the longest route (9 days)
More information on the routes here
Best time for the climb is one of the dry seasons – December-February or July-October.
Choose the company according to their offer and good references. The cost for the trip varies from USD 1200 to 5000 and more depending on the days and your ability to negotiate.
We paid USD 1700 – included 4 nights on the mountain, 5 days hike and meals on the mountain, transportation from Arusha and back, 3 nights in the hotel in Arusha, transportation from Nairobi to Arusha and back. Excluded Porter tips
How much should you tip your Kilimanjaro guides and porters?
 Kilimanjaro Porters


In some countries there is no culture of tipping the guides as there is awaited that the full service price is included in the package. However on Kilimanjaro you need to tip the porters to meet the minimum wage for porters and guides and decently pay for their labor.
Every year Kilimanjaro National Park sets a minimum wage for porters and guides. In 2017 it was USD 10 for porters and USD 20 for guides per day. For the hard work that is done by this guys it’s hardly enough. And it’s more than fair to tip them. The recommended tip is at least USD 10 per day. Also you can leave them your gear – water bottles, sleeping bags, parkas, boots.
To avoid any awkward situation after the hike – it is highly recommended:
- to meet your crew at your 1st campsite to ensure you have the full number of helpers promised by the company. You may write down the names of the crew.
- After the climb, when you return to the starting point – organize a tipping ceremony.
- It is better to place cash into individual envelopes and give it to each crew person. Make sure you are carrying enough cash for the tips in smaller notes.
- If you decide to give the full amount to the guide – make sure you announce the amount in front of the entire crew.
- You may tip on the side the porter or the guide who were especially attentive to you during your hike.
How to prepare yourself for the 6895m Kilimanjaro ascend?
To conquer the Kilimanjaro you should be in good health, with no heart or lungs conditions or big issues with your joints. It is recommended to consult your physician before signing in for the trip.
You need to have a certificate of the Yellow Fewer vaccination, which is mandatory to enter Tanzania.
The hike to the summit of Kilimanjaro is technically not very challenging with only few steep parts of the root. However it’s the altitude that should be taken very seriously. And even if you are in the best health condition, that doesn’t guarantee you won’t get the altitude sickness on the ascend. The altitude sickness comes unexpected with variations of symptoms – headaches, nausea, vomiting and sometimes hallucinations can knock you out from the first day. The slower pace and enough recovery time in the camps on the mountain, drinking of 4-5 liters of water will help your body to acclimatize better. Most of the hikers take Diamox that is supposed to combat the altitude sickness.
To prepare for the hike and to strengthen your cardiovascular system it is highly recommended to start your fitness training few months in advance – jogging, cycling, swimming, hiking.
What to pack for your Kilimanjaro trek?
- Big backpack (70l) or a duffel bag to be carried by the porters – should not exceed 15kg (the bags are weighted at the park entrance and the rule is strictly followed, so if you don’t want to add additional stress before entering the route with repacking your stuff – make sure you are not carrying more than allowed)
- Luggage lock – just in case to avoid any bad experiences – make sure your big backpack is locked before you hand it over to the porters.
- Day backpack – big enough to carry your camel back and water bottles, snakes, camera, extra layer of clothes (the weather is changing all the time – it’s good to have a rain jacket and a fleece shirt inside your bag)
- Sleeping bag – as worm as you can get it! Mine was with “comfort sleeping 0 to -5C and I had to sleep in my all available layers and in ski jacket and pants in the last camp not to freeze to death.
- Water bottle and camel back – make sure you can carry 6 liters. I had a camel back for 3l and two bottles a 1.5l
- Electrolytes/salts – to boost your body with more energy and keep your minerals in balance
- Ski-poles – I’m not a fan of the ski-poles and have never used them before, but I brought them to Kilimanjaro and they were helpful on the ascend from the summit as the mountain there is like a steep ski slope that is better assisted with the poles.
- Raincoat/rain poncho – will keep you dry and also protect you from the strong winds.
- Polar fleece – to keep you warm – 2 or even 3 of them, depending of the other clothing you have
- Waterproof ski jacket and pants or even warmer jacket. My ski/snowboard wear was definitely not enough.
- Gloves – warm winter gloves and thin fleece gloves
- Thermal underwear (long sleeves) – two pairs
- Thermal socks/wool socks – will save your live during the night
- Trekking boots – winter edition! I underestimated the cold (-15C on the last night climb) and had only low cut trekking boots – I at some point I thought my toes would freeze and I would need an amputation!
- Balaclava – will protect your ears and face from the strong winds
- Gaiters – to protect your clothing from the mud and dust. I only used them on the last day ascend. The way descend from the Gilman’s point is very dusty and even gaiters didn’t really save the situation.
- Insulated water flask – during the last day(which is actually night) summit ascend the temperatures are below zero – so your water will freeze in your camel back and bottles)
- Hot-water bottle – another tip to keep you warm during the night. Don’t try to fill your drinking water bottle with hot water to take it into the bed. It ended up melting the plastic cup and wetting my bed. Thank god yet outside of my sleeping bag. I don’t want to imagine the disaster of wetting my sleeping bag!
- Leggins/shorts/pants for the hiking days 1-2-3-5 – though the shorts are only enough on day one.
- Socks and underwear – enough for 6 days
- Shoes – sneakers or runners – for the camps to give your feet some rest from the boots.
- T-shirts and long sleeve shirts – 5-6 would be enough
- Sun hat or cap with a brim
- Head lamp – on day one we were hiking in the dark to the first camp and the day 4 hike is happening during the night times starting from midnight till the sunrise. Make sure you have spare batteries, just in case
- Sunglasses – the sun is very strong at all times
- Toilet kit with personal items (tooth brush, soap, small towel)
- WET WIPES and toilet paper are essential!!! You will drink a lot of water and most of the times you’ll have to use toilets with the views behind the bush. Also there will be almost no possibility to shower for 5 days. In some camps there were shower options, but only if you are able to shower in freezing water.
- Sunscreen – essential! The sun is so strong that even SPF100 didn’t work there
- Money belt – to keep your valuables with you at all times.
- Power/chocolate bars/nuts – at least 2-3 a day or even more, if you’d like to share with the guide/porters.
Comments
With thanks! Valuable information!
With thanks! Valuable information!
Hey would you mind letting me know which web hostyou’re using? I’ve loaded your blog in 3 different internet browsers and I must say this blog loads a lot faster then most.Can you suggest a good hosting provider at a reasonable price?Many thanks, I appreciate it!
Author
better check if your images are optimized for web 🙂